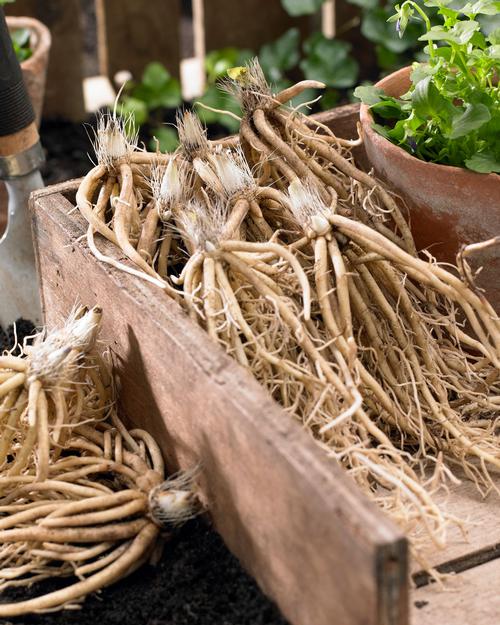
Planting and Care for Bare Root Perennials
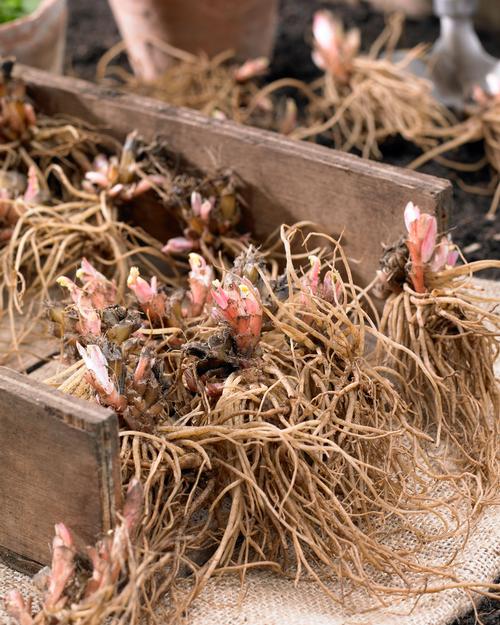
A bare root perennial is a plant that is shipped without soil or a pot. In most cases, bare root plants are shipped when they are dormant or just beginning to emerge from winter dormancy. Here’s how to help these new plants get off to a great start.
Examine the Plants
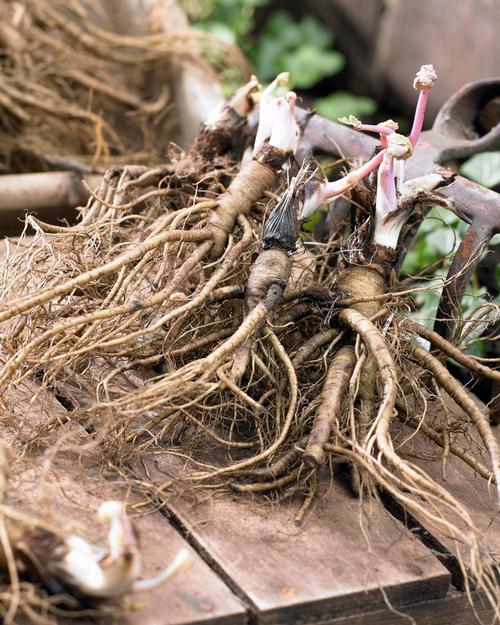
As soon as your plants arrive, it’s important to check them over. The roots of each type of plant are different. They may be wiry and thin, dense and fibrous or thick and fleshy. In all cases, the roots should not be completely dry, nor should they be soft and mushy. If some of the roots are broken or damaged, you can snip them off. If the roots seem very dry, mist them lightly and then put them back into the bag with the peat moss or wood shavings until you are ready to plant.
Plant As Soon As Possible
Bare root plants are dug and divided in the fall, then stored in a cooler until they are packaged and shipped in early spring. If you can’t plant immediately, keep the plants in their plastic bags and store them in a cool, dark place (above freezing). For best results, get your plants into the ground as quickly as possible.
Planting Depth
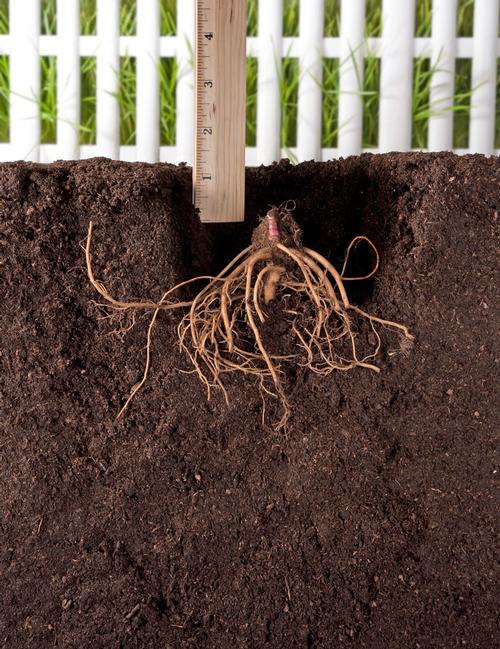
Most bare root perennials should be planted so the crown (where roots meet stem) is positioned at or just slightly below the soil surface. Please note that this is a general rule and does not apply to some types of plants. Check the package label for specific planting instructions. You can also find more details in our plant-specific articles HERE.
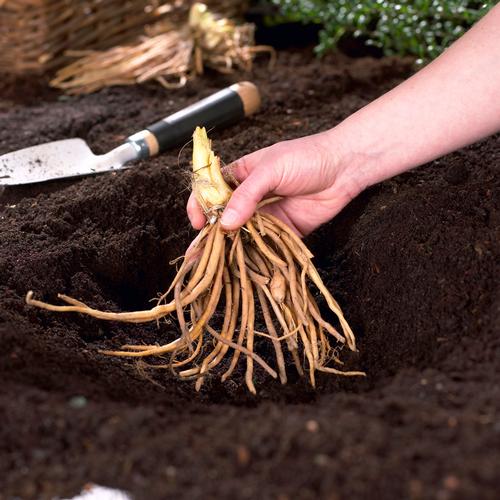
Planting Bare Root Perennials Directly into the Garden
If the weather has settled and the soil in your garden is warming up, you can plant directly into the garden. Soak the roots in a little water (for up to an hour) while you prepare the planting area. Loosen the soil to help the roots grow more easily. Then dig a hole that is several inches wider and deeper than the roots.
Mound up the soil in the center of the hole and set the roots on top, spreading them evenly. Adjust the planting depth so that after the hole has been backfilled, the crown of the plant will be even with or just slightly under the soil surface. Water deeply to settle the plant and make sure the soil around the roots is moist.
Planting Bare Root Perennials in Nursery Pots
If you want to give your new perennials a little extra TLC, you can get them started in pots. This way they won’t need to compete with other plants and it will be easier for you to control light and moisture. If you garden in the north, it's also a good way to get your plants growing while the weather warms up.
Choose a pot that is several times larger than the roots. Fill it half way with pre-moistened growing mix. Add the plant and continue filling the pot, taking care to keep the plant’s crown right at the soil level (if the crown is too deep it may rot). Label the pots and water well to settle the roots.
Put the pots under lights or near a window where they will get at least 10 hours of bright light each day. Water sparingly until the plants have several sets of new leaves and keep the pots indoors until all danger of frost has passed.
When it's time to move them outdoors, put the pots in a sheltered location where they will be shielded from hot sun, wind and rain. Once the plants have acclimated (give them a week or two) they can be planted into the garden. You may also continue growing them in pots and transplant anytime during the summer or fall.
Planting Bare Root Perennials in a Nursery Bed
Another alternative is to put your new plants in a garden bed that is reserved for young plants. A raised bed is ideal for this. Follow the planting instructions above, keeping the crown of the plant at soil level. Water sparingly until the plants are in active growth, then water as often as necessary. For extra protection from extreme weather, consider covering the plants with horticultural fabric.
These plants may be relocated to garden beds at any time during the growing season, as long as they are watered for the first few weeks. Another option is to leave the plants in the nursery bed until fall or the following spring.
Fertilizing Young Perennials
If possible, fertilize these new plants twice during the first growing season: once when they have at least 3 sets of new leaves and a second time in midsummer. Use a liquid fertilizer, diluted to half strength.
What to Expect from Your New Perennials
Some perennials grow more slowly than others. It usually takes a month or more to see new growth on peonies, clematis and alcea, while rudbeckia and heuchera fill out more quickly.
You can expect some newly-planted perennials to produce a handful of flowers the first year. More commonly, these young plants will concentrate on getting established and not bloom until the second year.
You'll find planting and care instructions for specific types of perennials HERE.
